
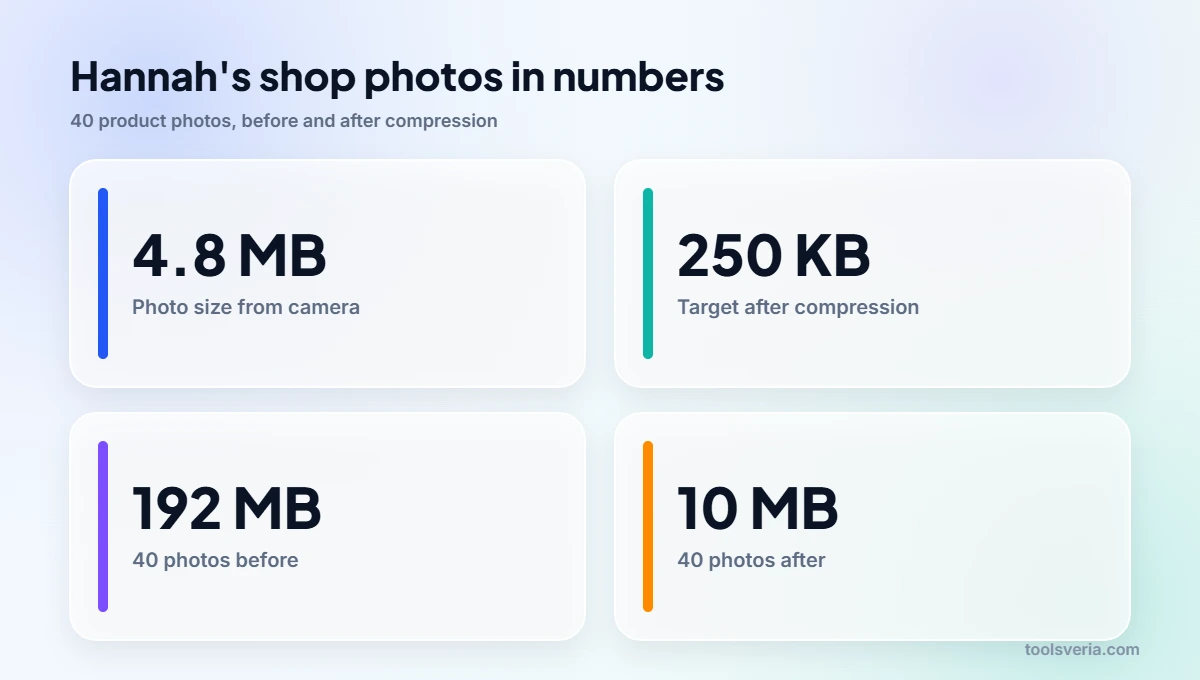
Hannah runs a flower shop in Bristol and photographed 40 bouquets for her new website. Every photo straight off her camera was a 4000 x 3000 JPEG of about 4.8 MB, and the gallery page took ages to appear on her phone. Working out how to compress images properly fixed it in an afternoon: each photo dropped to roughly 250 KB and the flowers looked exactly as vivid as before.
This guide explains the two kinds of compression, which format to pick, the quality settings that hide the savings from the eye, and the order of steps that gets the smallest file without visible loss.
Quick answer: To compress images without losing visible quality, first resize them to the largest size they will be displayed, then save photos as JPEG or WebP at a quality of about 75 to 85, and graphics as PNG or lossless WebP. Strip metadata and compare at 100% zoom. A 4.8 MB photo often ends up around 250 KB.
In This Guide
What is the difference between lossy and lossless compression?
Lossy compression makes files much smaller by permanently discarding fine detail the eye rarely notices, while lossless compression stores exactly the same pixels more efficiently and saves less space. Photos suit lossy formats; screenshots, logos and text suit lossless ones.
An uncompressed 4000 x 3000 photo holds 36 MB of colour data (12 million pixels at 3 bytes each). Hannah’s camera already saved it as a 4.8 MB JPEG, a lossy squeeze of about 7.5 to 1, and the picture still looked perfect. Lossy encoders work by simplifying subtle colour changes in smooth areas such as sky, petals and skin, where our eyes are least sensitive.
Lossless compression, used by PNG and GIF, looks for repeated patterns instead. It shines on images with large flat areas of colour, which is why a screenshot of a spreadsheet can be tiny as a PNG but huge as a JPEG with fuzzy halos around the text. The Wikipedia article on image compression describes the underlying methods in more detail.
Which image format compresses best?
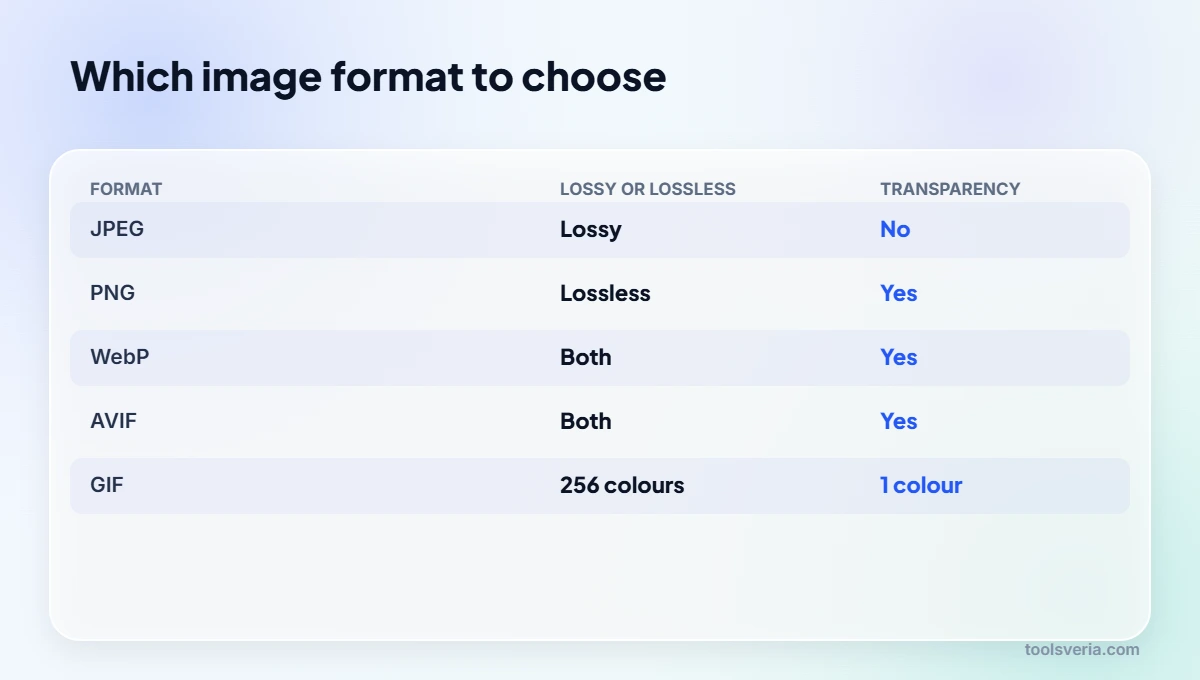
For photos on the web, AVIF and WebP usually produce the smallest files at the same visible quality, JPEG is the universal fallback, and PNG is best kept for graphics that need sharp edges or transparency. All current versions of Chrome, Edge, Firefox and Safari display WebP and AVIF.
| Format | Type of compression | Transparency | Best for |
|---|---|---|---|
| JPEG | Lossy | No | Photos anywhere, including email and older software |
| PNG | Lossless | Yes | Screenshots, logos, diagrams, text |
| WebP | Lossy or lossless | Yes | Website photos and graphics |
| AVIF | Lossy or lossless | Yes | Website photos where the smallest file matters |
| GIF | Lossless, 256 colours | One colour only | Simple short animations |
| SVG | Vector (not pixels) | Yes | Logos and icons that must scale to any size |
Google, which developed WebP, reports that its lossless files are 26% smaller than equivalent PNGs and its lossy files are 25 to 34% smaller than comparable JPEGs; the WebP documentation on Google for Developers explains how those tests were run. JPEG still wins on compatibility, so it is the right choice for email attachments, print shops and anything opened in older software.
How to compress images without losing quality, step by step
The order matters: resize first, then choose the format, then set the quality, because a smaller canvas does far more for file size than any quality slider. Here is the method Hannah used on her 40 bouquet photos.
- Resize to the display size. Her website shows product photos at most 1600 pixels wide, so she scaled 4000 x 3000 down to 1600 x 1200, which keeps only 16% of the pixels. Our guide on how to resize an image without stretching it covers the aspect ratio maths, and the image resizer does it in the browser.
- Pick the format. Photos went to JPEG for her email newsletter and WebP for the website, both produced in the free image compressor that works in your browser.
- Set the quality. She started at 80, then compared the result with the original at 100% zoom. If you cannot spot a difference, try 75; if petals look blotchy or edges show halos, go back up to 85.
- Strip metadata. Camera files carry EXIF data such as the date, camera model and often GPS coordinates. Removing it saves a few kilobytes and stops photos revealing where they were taken.
- Keep the original. Save compressed versions as copies. Re-saving a JPEG repeatedly compounds the loss, a problem known as generation loss.
- Check the total. Her gallery fell from 192 MB to about 10 MB.
Results vary with the picture itself. A busy photo full of leaves and texture compresses less than a bouquet against a plain white wall, so judge by eye rather than chasing an exact kilobyte figure.

What quality setting should you use?
A quality setting between 75 and 85 is a reliable starting point for JPEG and lossy WebP, giving files far smaller than quality 100 with differences most people cannot see at normal size. There is no universal number, because each encoder’s scale is slightly different and each photo behaves differently.
Above about 90, files grow quickly for almost no visible gain. Below about 60, problems start to show: blocky patches in smooth gradients, smeared fine textures and ringing around sharp edges such as text on a sign. Faces and skies reveal artefacts first, so check those areas when you compare.
For PNG there is no quality slider in the usual sense, because the format is lossless. The way to shrink a PNG is to reduce its colours (a logo rarely needs millions), resize it, or convert photos stored as PNG to JPEG or WebP. That last change alone often makes a huge difference, because a photo saved as PNG can be several times larger than the same photo as a JPEG.
Why does compressing images matter for websites and email?
Compressing images matters because pictures are usually the heaviest part of a web page, and smaller files load faster, use less mobile data and help pages meet Google’s Core Web Vitals target of a Largest Contentful Paint within 2.5 seconds. They also fit inside email and upload limits.
The arithmetic is simple. On a 10 megabit per second mobile connection, one 4.8 MB photo takes about 3.8 seconds to download, while a 250 KB version takes about 0.2 seconds. Multiply that by a gallery of 40 and the difference between a fast shop and an abandoned one becomes obvious. Gmail caps attachments at 25 MB, so five uncompressed camera photos can already push a message over the limit.
Compression also pairs well with good image housekeeping. Descriptive file names and alt text help search engines and screen reader users, and the image alt tag checker spots any pictures on a page that are missing them. If you need a tiny icon embedded straight into HTML or CSS, compress it first and then convert it with the image to Base64 converter, since Base64 makes files about a third larger.
Key points
- Resize before compressing: 4000 x 3000 to 1600 x 1200 keeps just 16% of the pixels.
- Use JPEG or WebP for photos and PNG or lossless WebP for graphics with sharp edges.
- A quality of 75 to 85 is a sound starting point for lossy formats.
- Strip EXIF metadata to save space and hide GPS location.
- Keep an original master and export new compressed copies from it.
Key Image Compression Terms Explained
These terms explain what is happening to your files when you work out how to compress images for a website, an email or an upload form.
- Lossy compression
- Lossy compression shrinks a file by permanently discarding detail the eye is unlikely to notice. JPEG, lossy WebP and AVIF use it, and the quality setting decides how much detail is thrown away.
- Lossless compression
- Lossless compression stores the same pixels more efficiently, so the image can be rebuilt exactly. PNG, GIF and lossless WebP use it, which suits screenshots, logos and graphics with sharp edges and flat colours.
- Quality setting
- The quality setting is a scale, usually 0 to 100, that controls how aggressively a lossy encoder works. Values around 75 to 85 often look identical to the original at normal viewing size while cutting the file substantially.
- EXIF metadata
- EXIF metadata is hidden information stored inside a photo, such as camera model, date and often GPS location. Removing it trims the file slightly and stops a shared picture revealing where it was taken.
- Generation loss
- Generation loss is the gradual drop in quality when a lossy file is edited and saved again and again. Keeping an original master and exporting fresh compressed copies from it avoids the problem.
Frequently Asked Questions
My compressed JPEG looks blocky around the sky. What should I change?
Raise the quality setting, because blocky patches in smooth areas mean the encoder discarded too much detail. Move from 70 to 80 or 85 and compare again at 100% zoom. Always compress from the original rather than the already compressed file, or the artefacts will build up.
Why did my file get bigger when I converted a JPEG to PNG?
PNG is lossless, so it stores every pixel the JPEG decoded, including its tiny artefacts, without discarding anything. Photos almost always grow when saved as PNG. Keep photos in JPEG, WebP or AVIF and reserve PNG for graphics and screenshots.
Is WebP safe to use on every website now?
Yes for browsers: all current versions of Chrome, Edge, Firefox and Safari display WebP. Google reports lossy WebP files 25 to 34% smaller than comparable JPEGs. Keep a JPEG copy for email newsletters and older desktop software, which may not open WebP files.
Will compressing a photo remove its location data?
Often, but not always. Browser based compressors that redraw the image on a canvas, such as ours, discard EXIF data including GPS coordinates. Some desktop programs keep metadata unless you untick an option, so check the export settings if location privacy matters.
How small should a website image be?
Size depends on the display, so resize first to the largest width it will appear at, often 1200 to 1600 pixels for content images. At that size, a well compressed photo often lands in the low hundreds of kilobytes, like Hannah’s 250 KB bouquets.
Can I compress a photo many times to keep shrinking it?
You can, but each lossy save throws away more detail, so quality drops faster than file size. Generation loss becomes visible after a few rounds. Instead, go back to the original, resize it smaller or lower the quality once, and export a fresh copy.
Hannah’s gallery now loads before her customers have finished scrolling, and the originals sit untouched in a folder for printing. Resize, choose the format, set the quality and keep your masters, and you have the whole method for how to compress images on any project. Guidance checked October 2026.